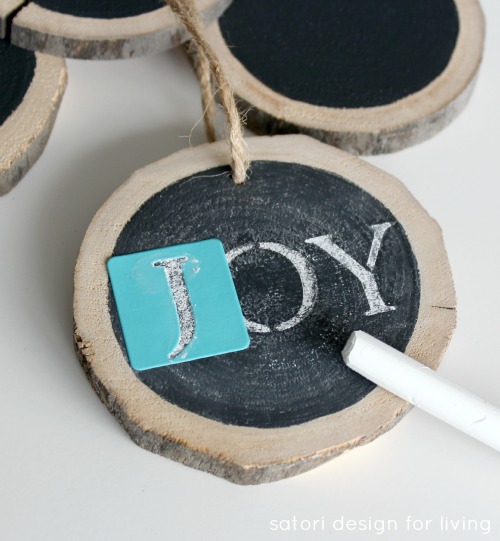
Log Slice Chalkboard Ornaments
Log slice chalkboard ornaments are so versatile and simple to make. Perfect as Christmas tree decorations, gift embellishments, place card holders and more!

I was very impressed with the glass paint projects the gals came up with last week. You? I’m certain this round of the One Item Project Challenge will be no different.
If you missed the introduction to this series and want to be brought up to speed, be sure to check out my snowflake glass canisters where you will also find the links to everyone’s projects.

This week I chose BRANCHES (twigs, logs or basically any part of the tree) as the item we had to work with. I’ve always been drawn to natural materials and knew I wanted to add a touch of the outdoors to my holiday decorating scheme this year.
That’s when the idea for log slice chalkboard ornaments came in.

Before we get to the tutorial for this project, I must give you a little behind the scenes…
Gathering Supplies
Those of you who have been following my Holiday Countdown know that I suggested gathering outdoor decorating materials several weeks ago before the weather turned miserable. Being a procrastinator at times, I waited until Friday to find the large tree branch I knew I would need for this project. The morning started out as rain and turned to sleet, and the forecast was saying snow for Saturday. I threw on my parka and the first boots I found and trudged down to the river. Unfortunately, I didn’t realize the paths were like a skating rink, and I ended up falling really hard on my back and elbows.
Lesson learned! DO NOT wear fashion boots into the woods, practice what I preach about gathering stuff before the weather turns and, lastly, choose less life-threatening DIY projects!
Needless to say, I survived. Despite having a sore back and a bruised ego (forgot to mention there were witnesses to my Home Alone type fall), I did manage (with a lot of help from my husband) to make the log slice chalkboard ornaments I had envisioned. Phew!

How to Make Log Slice Chalkboard Ornaments
Some links used in this post are affiliates. Please refer to my disclosure policy for more information.
Supplies
- Large tree branch or log (about 3-4″ in diameter)
- Mitre saw
- Drill with small bit
- Sand paper (extra fine grit)
- Chalkboard paint
- Paint brush (small)
- Jute string
- Scissors
- Chalk
- Stencils (optional)
Instructions
To begin, cut your log into slices (a little less than ½” thick) with a mitre saw. To get a nice clean cut, you may need to place a board under the log (we found doing that kept the bark in tact all around the log, especially on wider logs).

Once you have as many slices as you want, drill small holes in each about ¼” from the top to put the jute string hanger through.

Next, sand each one lightly to remove loose bits.
Make sure the surface is fairly smooth and apply two coats of chalkboard paint leaving a small border of wood showing. Allow to dry, then feed the jute string through each hole knotting together at the top.

Be sure to prime each chalkboard by rubbing the surface with a piece of chalk on its side and then wiping with a dry rag. This will prevent the first drawing from being permanently etched on the surface.

Finally, you have a chalkboard surface to write or draw anything on.
I freehanded a few designs and used stencils to create others. The sky’s the limit!
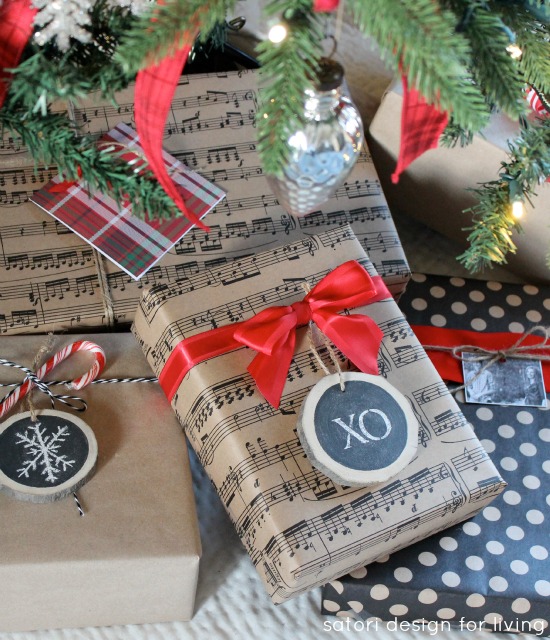
Other than hanging them on the tree, I think they’d make lovely place card holders with names written on them too.

So tell me, what would you draw on these wood slice ornaments? I like the combination of letters and simple drawings.

More Crafts Made with Branches
Rustic Stick Trees by Tiffany at Living Savvy

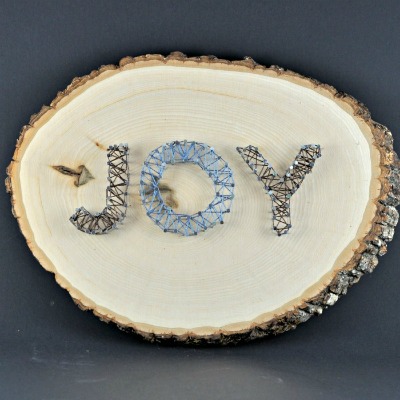
Joy Log Slice String Art by Tara at Suburble
Thankful Branches by Kristin at My Uncommon Slice of Suburbia

You may also like this woodland wreath I made using twigs and pine cones.
Be sure to come back next Wednesday to find out what the final craft supply was on our One Item Project Challenge list and see what we all did with it. So much fun!
Update: See our projects.
You can find more ideas like this in the Christmas Project Gallery, including how I used these chalkboard ornaments as gift embellishments!
Tell me, do you have any DIY Christmas ornaments of your own planned? I’d love to know what you’re up to!
Want more holiday and seasonal ideas like these sent directly to your inbox? Be sure to SUBSCRIBE.
xo,

Oh Shauna! First of all I love those ornaments, they turned out perfect! Too bad about you wiping out along the path – at least you looked great, hey? (I’m sorry, I’m laughing…). Take care my bloggy friend – and find some safer DIY projects, would ya!
It was like something out of Home Alone. I guess that’s what I get for being so careless! Thanks for the heads up on priming the chalkboard. I had made one a couple years ago and didn’t do that- you’re right, it does etch!
Great idea~thanks Shauna! I am impressed: a saw and a drill!! I am a little scared of both. Have a great day.
I am LOVING this idea. It’s so pretty and simple and lovely. I wanna make some!
Those are just charming! I will have to get working on a bunch for our tree this year!
How did you get your edge so amazing and straight? I \LOVE this project! They would make amazing gift tags! I’ve pinned it all over the place!
It’s called having help from my husband- he has way more experience with power tools than I do. Major brownie points!
Oh no, I mean the painted line, your chalk painted circles are just perfect! Did you tape them off, or is that free hand?
Oh duh, I see what you mean! I freehanded them with a smaller paint brush. I guess I’m wasting my steady hand on crafts when I should’ve been a surgeon LOL!
I just posted a very similar project today! Gotta love those tree slices and chalkboards. Love how yours turned out. :)
THese are adorable!!! So cute and original, sharing, pinning. Glad your site is back up.
XO
Krisitn
These are gorgeous, Shauna! I love-love-love them! Pinned! (Of course they are!)
These are awesome Shauna! In fact all the projects are fabulous – you are one talented group of ladies! I will have to try the slices one day, and thanks for the reminder about priming with chalk.
Love all the projects too!
These are amazing! I so want to make these for friend gifts this year! I wonder if I can find a wooded area to steal some branches… living in the flat burbs does not provide a lot of extra branches! How big was the branch you used? You are so talented… I want to be you when I grow up! XO
It was anywhere from 3 to 5″ in diameter and had to be about 12 feet long. My husband said I looked like a Labrador Retriever who was excited to find a new stick in the woods when I came home. It was a bit of a hunt, but lugging it up the path from the bottom of the bank was the real challenge (after having fallen before and being icy). The things we do for DIY!
You won’t need one that long, but I also used it for a couple other projects I will be posting soon. Good luck :)
So cool, if I have spare time I’m definitely trying the log ornaments.
These are so pretty! I got a miter saw for Christmas last year that I’ve hardly used. This looks like a good project that I can use it for. Thanks!
So very cute, Shauna. I’m pinning this! :)
These are so pretty! What a great idea! I love the rustic look of the ornaments, you did a great job with them!! Beautiful!
What a cute idea, Shauna! I’d love them on packages, too!
These are beautiful! Love how classic and modern they are!
Love these! They turned out great and I’m hoping to make a bunch this Christmas.
I love the rustic chic style of these pretty ornaments! Great job!
I simply LOVE these. What a great decoration idea!!!!
These turned out so cute, lovin the rustic look this year. New Follower! I would love it if you would link these up at my Holiday Party!
Kim
Love those wood ornaments! It great that you can change them up every year. These would also be great gift toppers using people’s names :)
What a great idea for ornaments! I’ve seen the log/chalkboard for other uses, but not yet for ornaments and I like thm a lot!
These look amazing and I know what I’m going to be doing this weekend! Thanks for sharing!
I love these and am hoping to make some this year for gifts! One question – do I need to spray or paint with some type of perservative?
Hi Laura, I didn’t find it was necessary. We’ve used them for a few years now and I find they still look the same. Pretty resilient!
Where did you find your stencils?
Hi Angie, I picked them up at Michaels. They’re Martha Stewart brand.