IKEA Hack Bar Cart (The Details)
An IKEA hack bar cart made from a Sniglar changing table?! See how easy it was to transform, plus get my tips for putting together a beverage station for outdoor entertaining.
I shared my DIY outdoor bar cart last week and promised a little tutorial for those of you who are interested in making one of your own. It was very simple to put together once I rounded up all of the supplies.
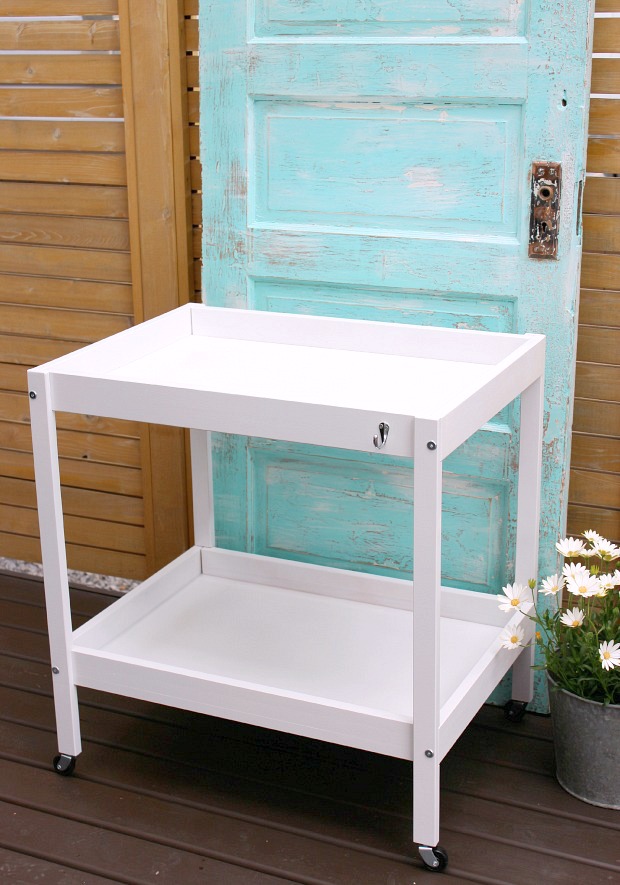
The whole jumping off point for this bar cart project was this IKEA Sniglar changing table I picked up at Value Village for less than $20. I could see its potential from the get-go.

Some links used in this post are affiliates. Please refer to my disclosure policy for more information.
How To: Ikea Hack Bar Cart
The Cart
Saving almost $20 by purchasing the IKEA Sniglar secondhand was a good start to the overall cost. You can also use an old TV stand, microwave cart or office unit to repurpose as a bar cart if you can’t find a simple baby change table.
Other Supplies
- 4 Swivelling casters- 1 5/8″ (I used Likewise brand from Canadian Tire)
- Sanding block (fine grit)
- Lint-free cloth
- Painter’s tape
- Indoor/Outdoor spray paint
- Drop cloths or cardboard
- Small hook with screw
Tools
- Saw (we used a mitre saw)
- Drill with bits
- Tin snips
- Hammer
- Screw driver
Cut Cart to Size
- Begin by measuring the finished height you’d like for your bar cart. We made ours 30 inches tall, which is basically table height.
- Using a saw (hand or mitre), carefully cut the legs down (be sure to account for the height of your casters when determining how much to take off).
Add the Casters

- Flip the table upside down and mark the center on the bottom of each leg. Drill a hole the size and depth outlined in the instructions for the casters.
- Before inserting the socket into the hole, trim the sides a bit with tin snips so they don’t overhang past the leg (if necessary). Gently tap into place.
- Press caster stem into socket until it locks.
Spray Paint
- Using a sanding block (or sanding paper), go over the entire surface to remove debris and roughen it up a bit. Wipe down with a lint-free cloth.
- Tape off casters and hardware with painter’s tape.
- Spray with two light coats of paint.
- Let it dry and remove the tape carefully.
Tips:
- To go around the circular bolts, press tape all around and remove excess from the outside edge with a utility knife.
- It’s best to spray paint outdoors or in your garage with drop cloths covering a large portion of the floor. Spray paint has a tendency to migrate (don’t ask me how I know).
- Be sure to have the door at least partly open and wear a mask. The fumes are strong!
- I used Rustoleum’s Universal spray paint which has a paint and primer in one. Otherwise, I would suggest spray priming first for best stain blockage, adhesion and overall coverage.
- Two light coats seemed to cover well. The comfort spray tip made painting easy and it went on evenly with no drips. The next day, I did go back and touch up a few areas with some light passes.
- Although we’ll use this cart mostly for outdoor entertaining, it’ll be stored inside. To protect it even further, I plan on giving the whole thing a coat of clear paste wax, finished with a good buffing (still on my to-do list).
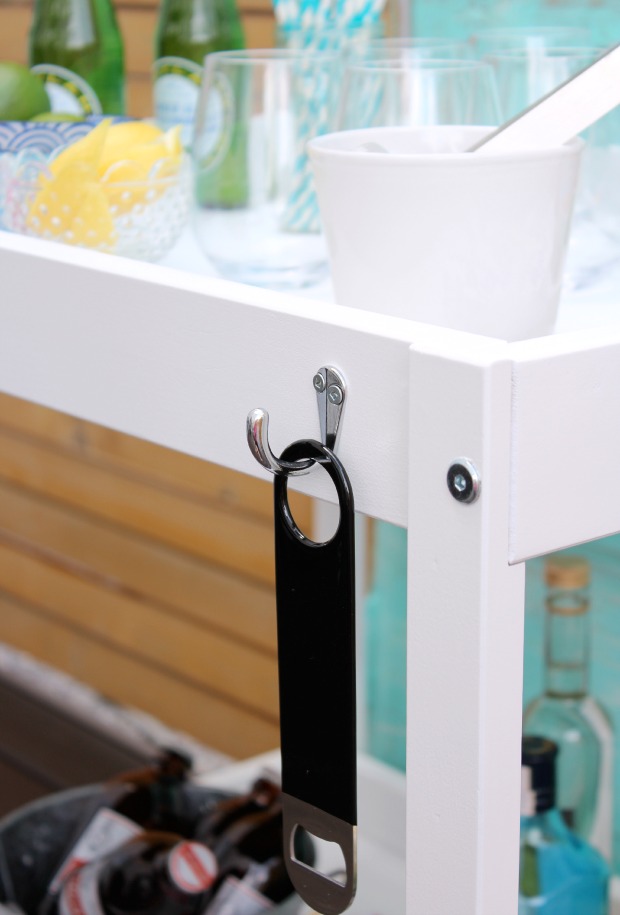
Attach Hook
- Hold the hook up where you want it and mark the holes with a pencil.
- Pre-drill the screw holes using a small bit to prevent the wood from splitting.
Tip: Be sure to check the depth of your screws before attaching the hook to the edge. The ones that came with the hook were too deep for the cart and would’ve penetrated the other side of the wood, so I changed them out with shorter ones.
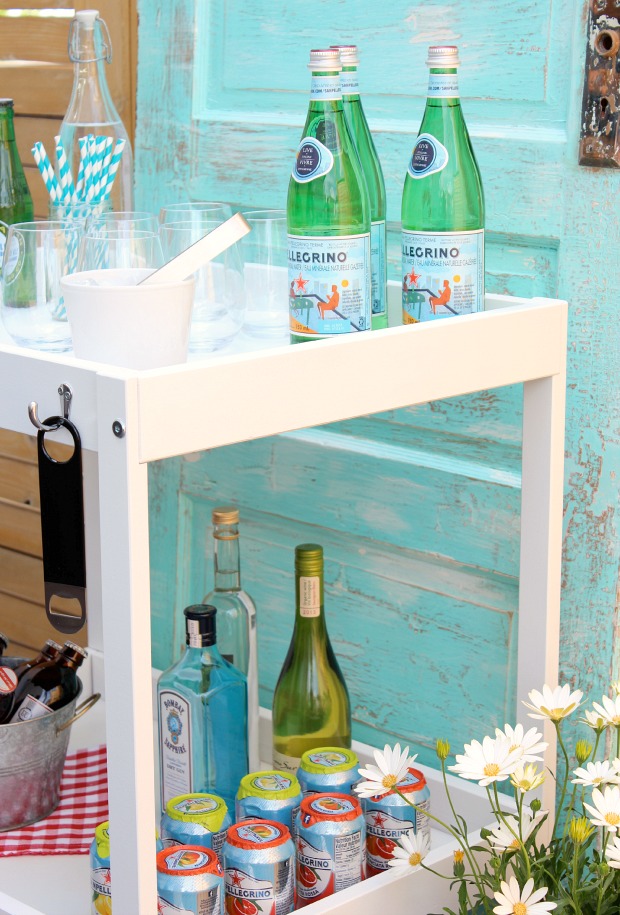
Et voila! An Ikea Hack Bar Cart for less than $45! It’s so nice to have the extra storage.
How to Style the Bar Cart
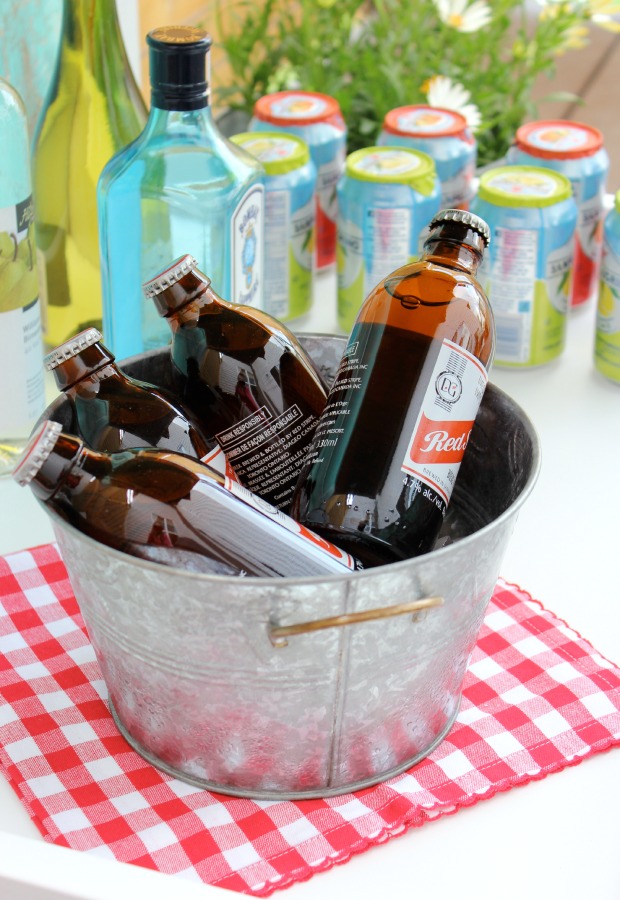
Stock your bar cart with:
- outdoor glasses
- ice bucket
- assortment of beverages
- straws
- napkins
- garnishes and more
The fun part is changing it up depending on who your guests are or what the theme of your party is.

I put this one together for casual Friday night drinks with the neighbours around the fire.


A must-have for my husband on a hot summer day is a bucket of ice cold beer (to share, of course). Like it too?
So, what do you think of this IKEA Sniglar changing table hack? Want to make your own?
Be sure to pin this project for later!

More Outdoor Entertaining Ideas
Planning on entertaining this spring or summer? You may want to check out these ideas too!
Flea Market Style Outdoor Tablescape


One other thing before you head off… If you’re looking for more useful and pretty ideas in your life, make sure you’re on the email list! You can subscribe here.
Cheers!