Hot Chocolate Bar {All the Details}
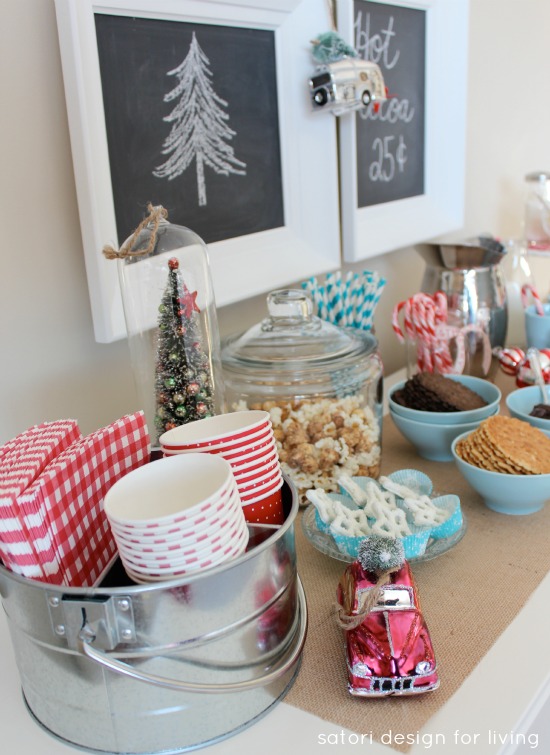
Sharing the details from our holiday hot chocolate bar. Find out how to create your own with complete source list and chalkboard instructions.
Last week I shared the hot cocoa station (aka hot chocolate bar) I put together for the holiday season. As promised, I’m sharing the details of that project with you today. Be sure to grab a cup of deliciousness for yourself while you read on!

Before I get to the DIY details and source list, here are a few more photos to refresh your memory…


Some links used in this post are affiliates. Please refer to my disclosure policy for more information.
Hot Chocolate Bar Projects and Source List
New Items
- Ornaments- Pottery Barn
- Paper cups, napkins, mugs, blue bowls, glass sugar dishes, milk bottles- IKEA
- Ribbon and burlap runner- Michaels
- Hot cocoa- Godiva
Items I Already Had
- Straws- Partystock
- Glass candle pedestal- Restoration Hardware
- Apothecary jar, metal caddy and cake plate- Winners
- Hammered metal jug- Hudson’s Bay
- Antique spoons and small pedestal plate were wedding gifts
- Snowflake glass canisters- DIY project
- Frames for chalkboard and sprinkles shaker- Thrift Shop
DIY Framed Chalkboards
To make the chalkboards, I painted the wooden picture frames I found in our storage room white. Next, I cut a piece of thin wood to fit each opening, then painted them out in chalkboard paint.

Before you use your newly created chalkboard, prime the surface by rubbing with a piece of chalk on its side and then wiping with a dry rag. It prevents the first drawing from being permanently etched on the surface.

Hot Chocolate Party Favours
For the to-go pouches, I simply filled a cellophane bag with hot chocolate mix, white and dark chocolate chips and a large marshmallow. Then I tied it up with ribbon.
Next, I glued ribbon around the cup, leaving enough room to stick the straw through.

To see more photos, check out the original post: Nostalgic Hot Cocoa Station
Have any other questions about my hot chocolate bar? Post them in the comments section below and I’ll be happy to get back to you!
You can also see how I used these same Pottery Barn ornaments to decorate our Christmas tree.
More Hot Drink Ideas
Want more holiday and seasonal ideas like these sent directly to your inbox? Be sure to SUBSCRIBE.
Enjoy your day,


Such wonderful ideas here including the ribbon detail which makes it more special. Very pretty bar, Shauna!
Thanks Lisa!
I love it! I long to have a hot chocolate bar – especially with Godiva and Pottery Barn visiting! ;)
You should do one for sure. Your kids would love it! I decided last year I wanted to do one for this season, so write it down and make sure you follow through with it- you won’t be disappointed!
I love it Shauna! So pretty and all the little details are wonderful! Great colour scheme! Angie xo