Shaker Style Trim and Doors (The Makeover Details)
Installing shaker style trim and doors throughout our entire main floor made everything look so bright and fresh. You won’t believe the difference simple trim and white paint made!
Hello, friends! After loads of questions (and as promised), I’m sharing more details of our main floor renovation. Today it’s all about our white-painted shaker style trim (or craftsman style trim) and doors.

To begin, let me give you a bit of the backstory. While looking to move to the town we currently live in more than a decade ago, the selection of homes for sale in our price range was very limited. It was the very start of the housing boom when everything was just starting to take off. After searching around, nothing was checking our boxes completely, so we had to go with the best option we could afford before inventory was even more limited or prices became far too high. The home we ended up going with was a builder’s spec home in a very good neighbourhood.
Although we were very relieved to have found something, I was less than enthusiastic about some of the finishes in the house. From the moment we moved in, there was a very long list of changes we wanted to make, and the trim was definitely near the top of the list.
Our Oak Trim Before
Picture skimpy oak baseboards and door casings in a reddish-orange stain. Yuck! Unfortunately, they made every room in our house feel quite dark and closed-in as you can see in the pre-renovation kitchen photo below.

See what I mean?
I’m someone who knows white paint can be a miracle worker, but even it has its limitations at times. Who knows, painting that existing trim may have even made it look worse. I wasn’t going to give it the time or effort to find out.
So, if our trim was really that terrible, why did it take us so long to change it out?
Over the years, life in our home carried on with small projects here and there, but busy schedules meant we never quite found the time to tackle bigger ones. Like many families, we spent our time at the hockey arena, helping with homework, making meals, doing laundry, walking the dog, travelling for work… you get the picture. Somehow, I learned to look past the ugly details of our home, keeping in mind that someday we’d address every single one of them.
Can you relate?

Where We Installed New White Trim
After years of patience while saving up the money, and finally setting aside the time, we decided to renovate our entire main floor at once.
This included our entryway, powder room, living room, laundry room, kitchen and staircase. We figured we may as well live through the mess once rather than room by room. (In retrospect, we really didn’t know the chaos we were getting ourselves into, but it’s all over now and we survived to tell about it!)
Shaker Style Trim Details
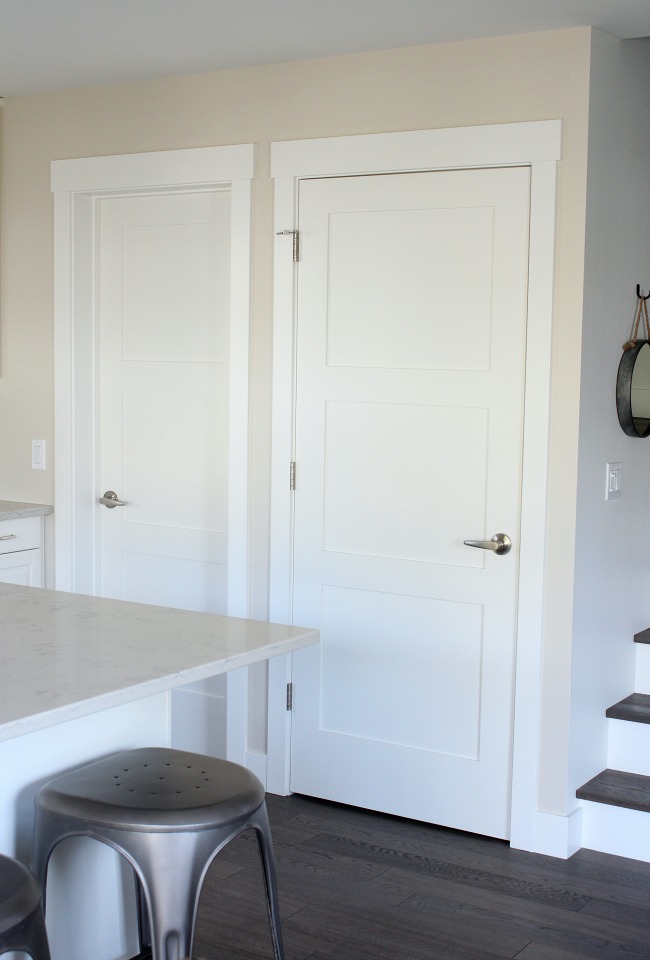
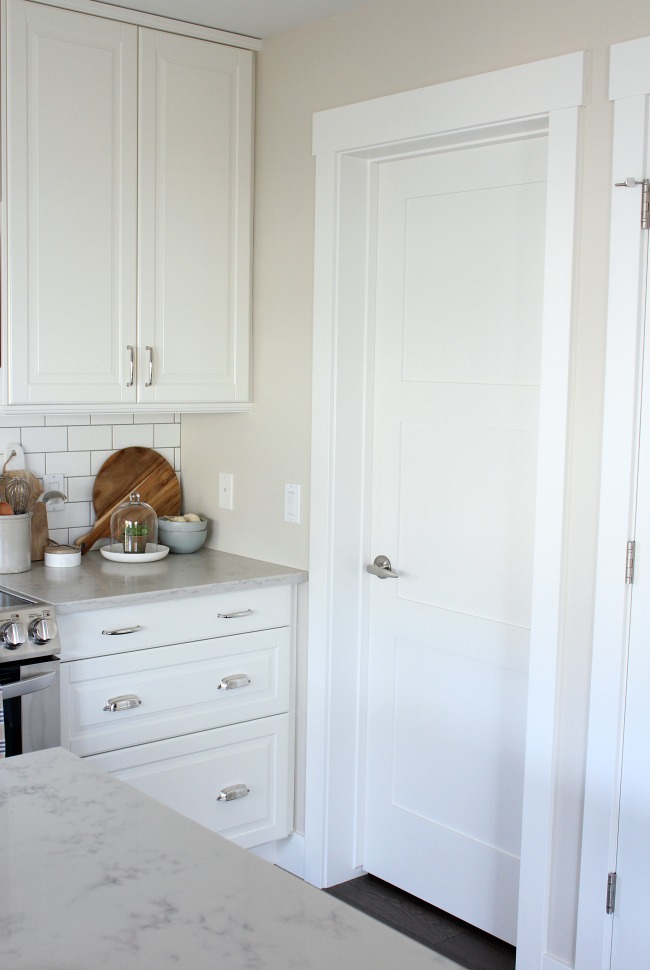
We installed flat stock MDF in a shaker or craftsman style to match our new 3-panel doors. Shaker is known for its clean lines and simple details which seem to stand the test of time. It’s the same classic look we selected for our basement development a few years earlier.
Keeping trim styles consistent throughout a home helps to create good flow. Be sure to consider door trim, window trim, baseboard trim and possibly crown moulding when you’re planning your own renovation, whether it’s all at once or room-by-room.
As part of our design plan, we increased the size of our baseboards and window casings too.
Tip: Be sure to check out the sources listed at the bottom of the post for trim dimensions.
These kinds of small tweaks freshen up a space and elevate it to new heights. Quite often, it’s these simple details that end up yielding the best return on investment.
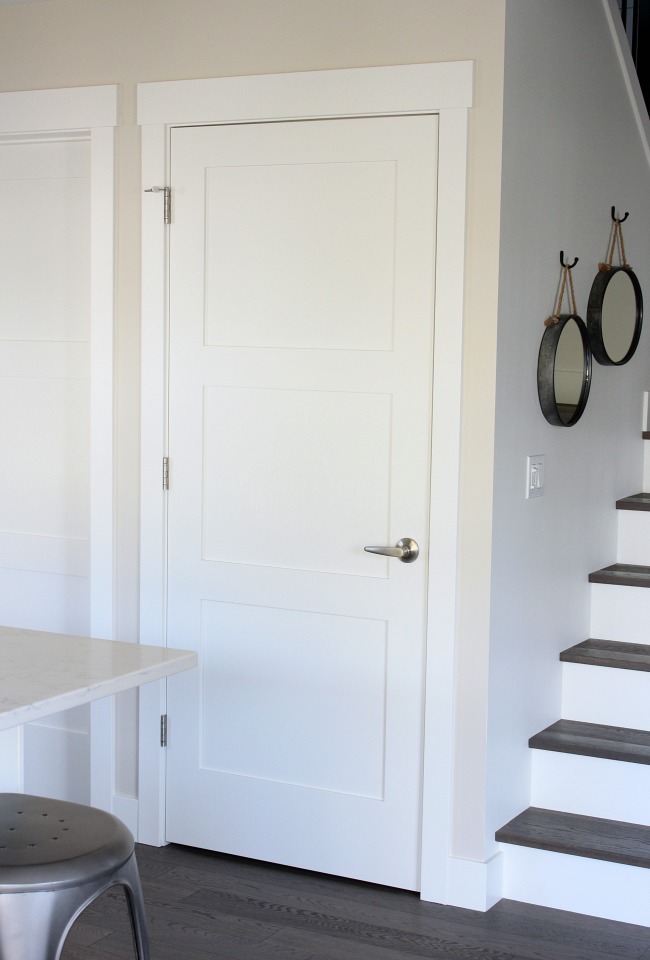
I love how the shaker style baseboard trim pops against the white oak hardwood floor, as well as the Brazilian slate tile floor we installed in the entryway, powder room and laundry room. It’s the contrast I was looking for.
And those shaker style interior doors are simple, yet beautiful.

Fireplace Update Using Trim
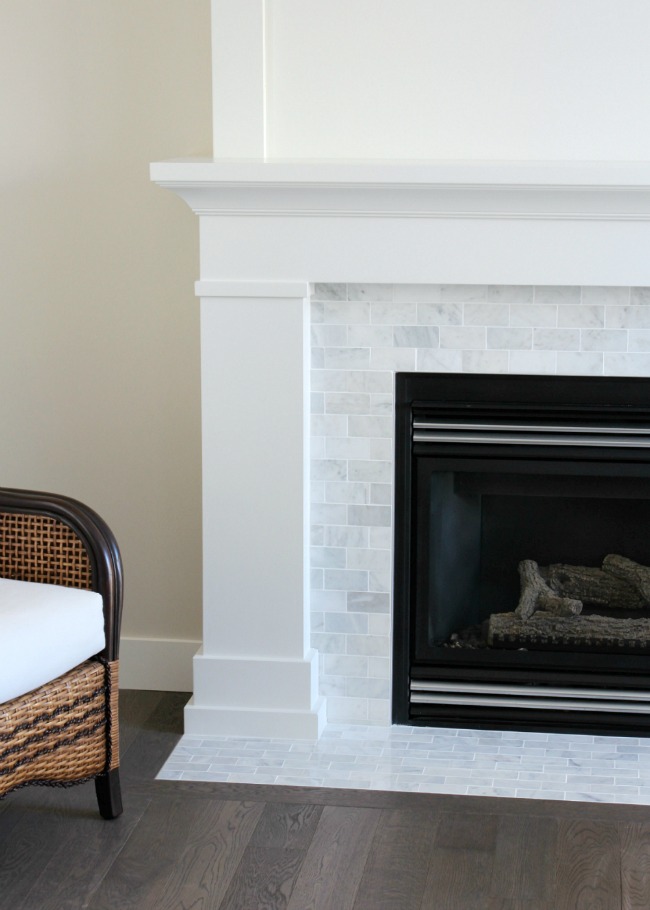
One of the biggest transformations we made to our home during our renovation was updating our fireplace. Being the focal point of our living room and one of the spaces you first notice when you walk into our home, meant it was important to get the design right.
As you can see, our fireplace had far too much going on before with the arched top, textured finish, and red oak mantel. It was definitely a focal point, but not in a good way.

After covering over the textured surface and filling in the arch with new drywall, we created beautiful fireplace details using simple MDF, crown moulding, casing and stop. Once everything was painted out in White Dove by Benjamin Moore, our fireplace gained the depth and visual interest it once lacked.
With careful planning, you can definitely achieve a high end look without investing big in materials and finishes. I believe our shaker style fireplace project is a good example of that.
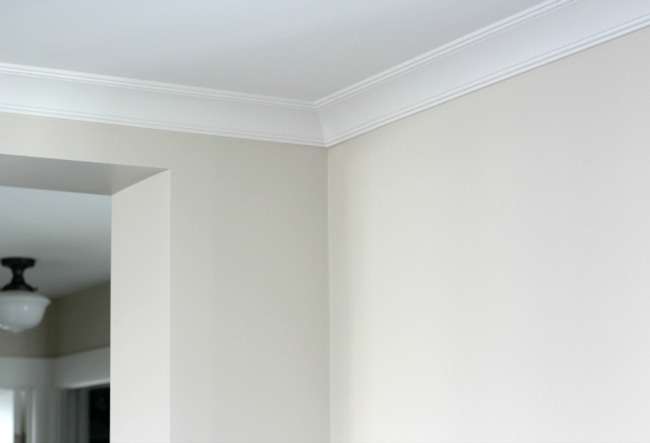
Crown Moulding
To create a seamless finish, we took the same style crown moulding we used to create the mantel and carried it around the ceiling perimeter of the living room. It made the room look “finished” and grown up. Funny how a small change like that can be so drastic.
Getting rid of the popcorn ceiling helped too, especially since it’s only 8 feet high. No matter the time of year, our living room looks bright and fresh.
Our new shaker trim work has definitely breathed new life into our home. I’m no longer restricted in my decorating choices, worrying if the space will be too dark or whether or not the colours will clash or patterns will be too busy. Instead, we have a beautiful backdrop with oodles of possibilities. I guess waiting all those years was worth it in the end.
Do you have any big renovation projects you’re saving for? Planning on changing out your trim and doors? Thinking about shaker or craftsman trim similar to ours?Tell me about it in the comments!
Shaker Style Trim Sources:
Doors– 3 Panel door in Harvest style
Door and Window Trim– Flat Stock MDF (Baseboard 1/2 x 5″; Casing sides and bottom 5/8 x 3″; Casing top 3/4 x 4 9/16″)
Crown Moulding– Fashion Forward (3/4 x 4 1/4″)
Trim and Door Paint– White Dove OC-17 (see more details in this post)
And, of course, you can find more sources on the Shop Our Home page or visit Our Home Projects gallery to see even more.
Want more home improvement projects like these sent directly to your inbox? Be sure to SUBSCRIBE.
So glad you stopped by!

How much over hang on the top trim over door?
It’s the full depth of the header- 3/4″
Hi Shauna! This looks fantastic thanks for the inspiration. Did you match your window casings/trim to match your doors?
Thank you! Yes, we did do the same as the doors for the windows. Except for the window above the kitchen sink which has subway tile around it so we went with simple mitred corners in the casing size.
Wow! Looks beautiful, great job!
Where did you get the Door and Window Trim– Flat Stock MDF (Baseboard 1/2 x 5″; Casing sides and bottom 5/8 x 3″; Casing top 3/4 x 4 9/16″)
Can you put a picture up of what the side of your fireplace looks like?
Hi Julie, You can see more photos of our fireplace in this post.
I see the question about overhang on the top of doors, does that mean the door top trim piece is 3/4″ longer on each side of each side trim piece?
Hi Paul, Actually, it’s about 1/2″ longer on each side. The 3/4″ refers to the depth of the piece of MDF as the header. Hope that make sense :)
The trim looks great ! How wide is the door trim – and how wide for the header above
I am looking for similar and need very soon but not finding. Please advise as to where you found the trim. I need framing around doors and windows plus baseboard. Thank you.
Hi Maureen, Did you try Lowes? At the time of our renovation, they carried the Metrie flatstock trim. Or, if you go to their website, they should have a list of where to buy in your location. Hope this helps!
We’re trying to replace our existing trim with a shaker style trim. We have a number of doors that are so close to the adjacent wall that it allows for the header trim to extend ( 1/2 inch) only on one side of the door. Since that would result in a lopsided looking door I’m trying to come up with a solution. Did you run into a similar problem or have any ideas?
I’ve done it with the top piece flush against the sides on interior doors since my doors are close together in corners, similar to yours. It still looks really good. I saw some pictures online of people who did it lopsided and it looks way worse than mine do (in my opinion)
Beautiful job, really well done! For the trim on top of the doors did you do returns on the ends or just cut them square and paint them? If they are simply cut square and painted did you apply some kind of sealant to the mdf before painting?
Hi Glen, Thank you! We didn’t apply a sealant but did spray primer followed by lacquer. It gave a flawless finish. You can see more in this post.
Looks so clean and breezy! Did you paint doors in semi gloss or some kind of chalk Matt paint?
Hi Guzal, They were sprayed using a water-based lacquer.
Hi again Shauna,
Did you go with the 3/4 x 4 9/16″ trim for the tops of your windows too or did you do the 5/8 x 3″ on all four sides (or something else?)
Hi Glen, Over our kitchen window we went with the 3″ all around because of the tile backsplash going to the ceiling. The rest of the main floor is done in the larger trim piece at the top, which is same as the doors. You can see more of what I’m talking about in this post: Kitchen Renovation
What brand and style are the room door levers and hinges. I really like them. Your remodel looks great
Thank you for the information.
Hi Lorrie, The door levers are Gatehouse Florence from Lowes. The hinges are ball bearing style from TimberTown. Hope this helps!
Where did you get the tile surround on the fireplace?
Hi Erin, You can get all of the fireplace details in this post.
Is the trim eased edge?
Yes it is!
Is the Metrie Flat Stock eased edge when purchased?
Hi Megan, Yes, we installed it how it came. Hope this helps :)
What is the gray floor tile in your laundry room? I need it!
Hi Erika, It’s Brazilian Slate tile that we picked up at Euro Ceramic Tile. I believe it’s still available.
Size: 12×24
Code: AV-SLT1224-GRE
Are the measurements you listed what the boards are called, or are they the actual measurements? I still don’t understand why they are called different than their actual measurements….. thanks!
Hi Bev, The measurements correspond with what we actually installed. The names listed are the styles of casings and baseboards made by Metrie, i.e. Flat Stock and Fashion Forward.
What color did you use on the walls?
The main floor (kitchen, living room and entryway) are painted in Benjamin Moore Baby Fawn.
We live in a 1988 split ranch house, fairly open concept with vaulted ceilings – living/kitchen/dining area. I love the shaker style – and plan for shaker kitchen cabinets and 2 panel interior doors. Do you think the shaker trim/baseboards (which I love) is too much? Should I honor the ’80s style of the ranch and just do ranch trim on the 2 panel doors? THANK YOU!
Hi Megan, I think it’s a personal preference and depends on the look you’re going for. In our new house, we used 3.5″ flat stock trim all around the doors and windows (without the overhang on the edges). If you’re worried about it being “too much”, that’s an option as well.
Hello! I absolutely love this trim look and I am going to utilize it in my home. I really appreciate your sharing the dimensions! I am curious about what you did for closets, or if you have a source of complementary closet doors?
We also have a larger than standard opening under the stairs that I thought a bifold closet door might work well for, to minimize the required space needed for door swing in a hallway.
Hi Lindsay, Thank you for your kind comments! For closets, we did double shaker style doors. You can see an example in this post.
In our basement, we did the same style door to create a wider entrance to our storage room.
How do I measure to install flat stock baseboard to rounded corners?
Did u not use a shoe?
No, we didn’t need it.
What size is your baseboards? Thank you!
Hi Becky, They’re 5 inches tall and 1/2 inch deep.