Staircase Update: Stripping & Staining the Wood
Is your staircase looking dated? Learn how to give it a fresh new look by stripping and staining the wood a beautiful new colour.
A while back, I shared the plans for our staircase makeover. It’s a DIY project that’s been long overdue, and I’m so excited to finally be making progress. As a reminder, here’s the overall look we’re going for (although ours is a little more closed in than this beauty)…
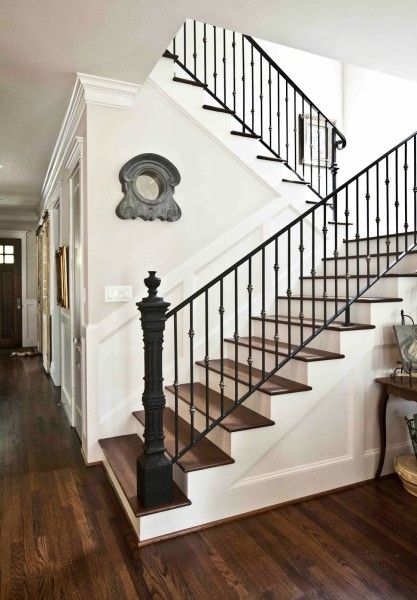
Cedar Hill Farmhouse via Eclectically Vintage
Staircase Update
Getting rid of the dingy carpet on the stairs was fairly simple aside from pulling out countless staples. I guess that’s easy for me to say since my husband and son took care of it all. They’re both really good at the destruction part of a renovation. Guys seem to really enjoy breaking things, don’t they?
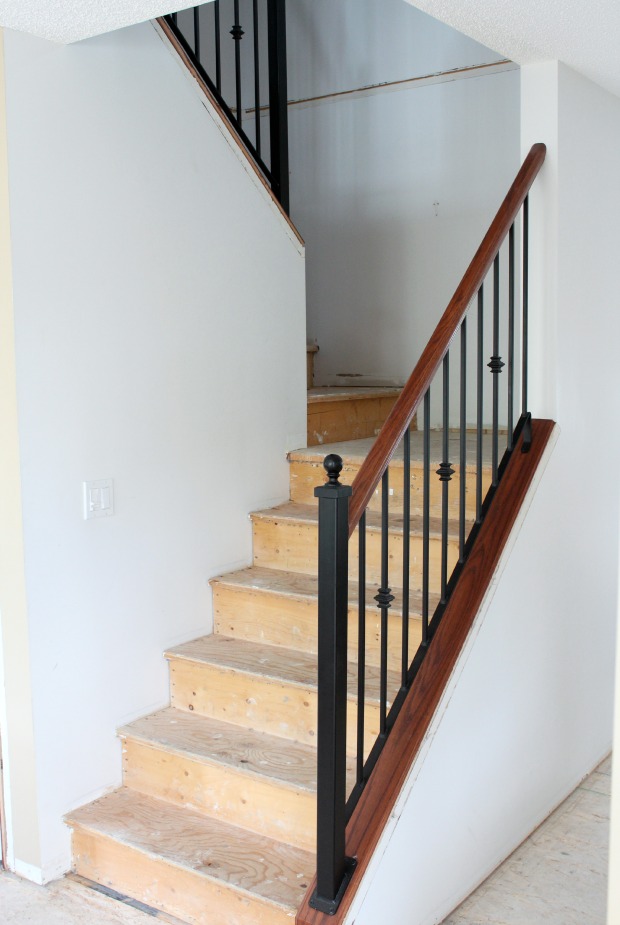
After that, we were still left with the orange-y red stain on the handrails and bottom part where the posts get screwed in (not sure what the technical term is for that). I thought about painting it the white trim colour, but I didn’t think it would hold up well over time. Somehow, I knew stripping it down to the bare wood wasn’t going to be a walk in the park, but I was willing to try.
Unfortunately, anything related to painting and staining is often handed off to me. Not because they’re incapable, but I tend to be more detail oriented. Plus, I grew up on a farm where one tends to get a lot of experience in the painting and staining department to say the least. Know what I mean?
Some links used in this post are affiliates. Please refer to my disclosure policy for more information.
Removing Stain From Staircase
On one of my many trips to Home Depot over the course of this renovation, I came across a biodegradable furniture stripper called Bio Option that seemed like a safer alternative to some of the toxic ones that are readily available. I’ve heard good things about this stripping gel too. Being quite sensitive to chemicals, I thought I’d give it a whirl.

We removed the oak handrails and took them out to the garage where I had an old folding table lined with plastic and brown paper. I applied a generous coating of the stripper with an old paint brush to each one. Even though the product didn’t have a harsh smell, I wore disposable gloves and a mask just to be safe. I also kept the garage door wide open for proper ventilation.
Each stain finish is different, of course, but allowing the product to sit for an hour or so before scraping with an old putty knife seemed to work best. I believe this wood had stain plus a clear coat or two, so it was a bit tough coming off. On some difficult areas, I had to apply the wood stripper twice and ended up using steel wool to get into the grooves.
To clean up the excess, the instructions said to use paint thinner. I wasn’t too keen on it, but I did find one from the same brand that was low odour, which seemed to work well (mask and gloves, of course).
For the rest of the wood, I had to finish it inside. At first, I left the iron spindle part attached to the base (because I was home by myself and was too impatient to wait for my husband to come home to help), so I ended up taping everything off and tackling it that way. When you have someone coming to install the trim in two days you have no other choice, right?
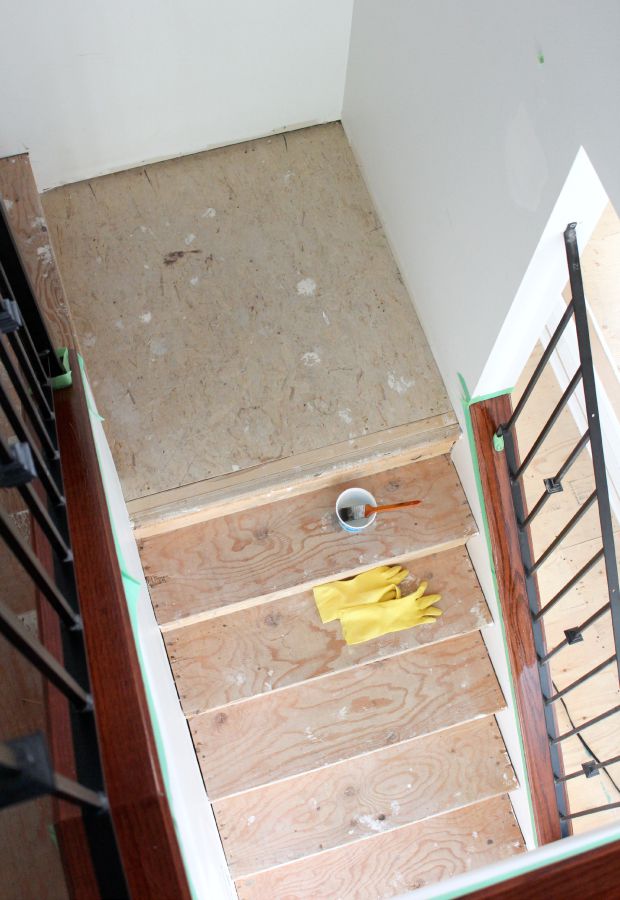
Again, it took two coats of the biodegradable wood stripper and a lot of passes with the scraper and steel wool to remove the finish. I used a bit of the paint thinner to clean it up too.
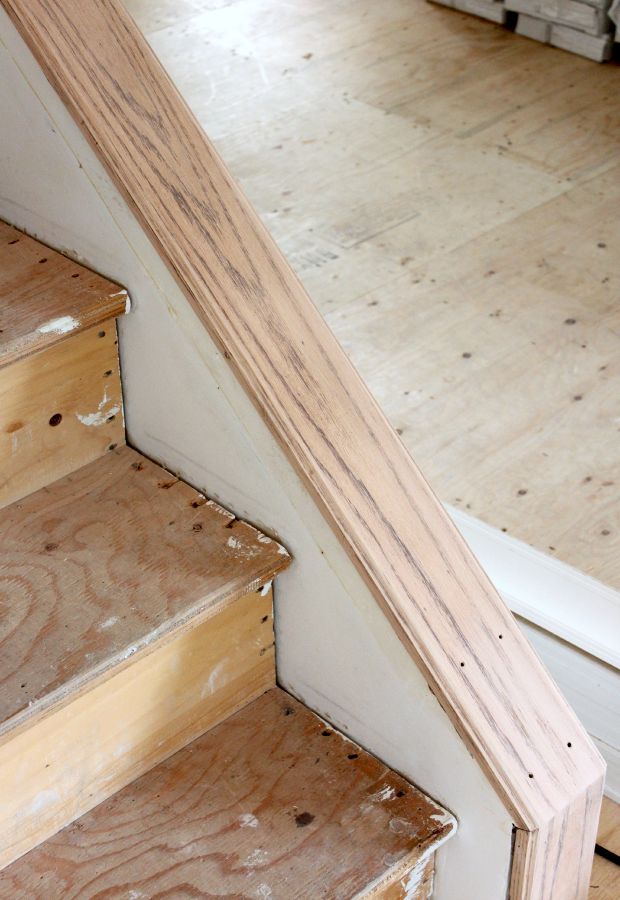
To get it down to the bare wood, we ended up removing the railing and using an orbital sander starting with 100 grit paper and finishing off with 180 grit.
Staining the Wood
For the stain, I used Minwax espresso. I simply brushed it on, waited a bit, then removed the excess with a rag. It was quite easy.
I was hoping to get the finish as close in colour to the new hardwood we selected, but it turned out a bit darker. This wood is red oak, whereas our floors are wire brushed white oak. (You can see a bit of a pink undertone on the bare wood.) Plus, each piece of wood takes stain differently depending on the grain.
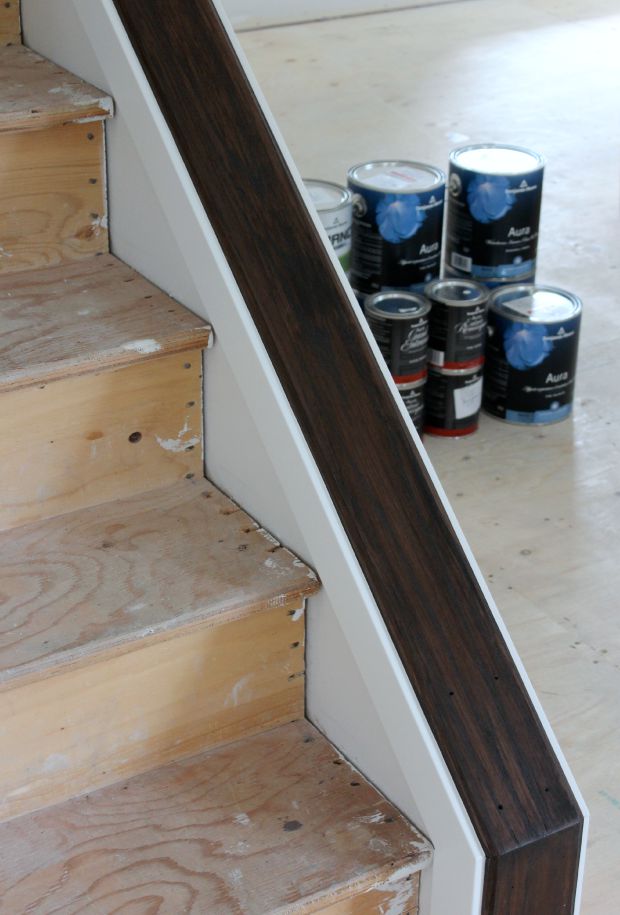
To me, it looks so much better than what was there before. Once the hardwood treads go in, I’ll be able to tell if the colour needs a little tweaking. I’m holding off staining the handrails until I see how it all looks together. Hopefully I won’t need to paint over it all in the end. That would not make me happy!
Have any experience stripping and staining stairs? If so, I’d love to find out more tips to speed up the process or get a beautiful finish.
Be sure to follow along on Instagram to see behind-the-scenes renovation progress pics.
Wood Staircase Update: See our fully finished hardwood stairs with white risers!
Want more home improvement projects like these sent directly to your inbox? Be sure to SUBSCRIBE.
Thanks for stopping by,

Yay! I loved the wood once it was stripped, but the dark stain is to die for!
Thanks Ariel! I was afraid to stain it after all the work getting it off, but I think it will look good in the end- here’s hoping!
Oh that’s going to look gorgeous Shauna, looking forward to the reveal!
Shauna the colour is amazing! It looks brand new. Sometimes people think stripping the wood is going to be way too much work. This shows how the results are so worth it! Looking forward to the final reveal of all the stairs
It’s not too bad. I just felt the pressure since our trim guy was coming (as you know with renovation timelines)!
Wow, Shauna that’s a lot of work!! But it looks amazing!! Can’t wait to see the final result.
Oh that colour is decadent! I am itching to do our stairs… Bud is just rolling his eyes at me. Haha, one project at a time! I can’t wait to see how awesome these will be!
If you don’t have pie shaped stairs it’s not too complicated. Unfortunately, we do, so we ended up hiring someone to install it for us. Pricey, but worth it I think.
I’m loving it Shauna! I think it’s going to look stunning, and I so hope you don’t have to paint over all your hard work. I keep wimping out when it comes to stripping and one of the reasons is the toxic nature of it – I am so grateful for your share of the product you found. This might actually move me in the stripping direction… ooo, that didn’t come out right! ;-)
You crack me up! This product seemed to work well and wasn’t too bad for fumes. I’d still tackle it in the garage or outside if you can.
I am renovating my house from carpet to hardwood floor. The most difficult part is the stairs. Your writing gave to me quite a few hints. It is very helpful. Thanks for your sharing!
When I read the part ‘ Guys seem to enjoy breaking things” I was laughing. My husband is exactly like this:)
Again, Thanks for the articles.
This is a stunning makeover of yours. This is amazing. It looks simple but awesome. Thank you for sharing this one.
The cost for a company to come in and sand/strip the stairs and re-stain is UNBELIEVEABLE!! Considering doing it ourselves. Big job?? Long Job?? Any other hints to make it easier??
Hi Jeff, The prep work is what takes the longest. Start out with a medium grit sand paper then work your way to fine/very fine. We purchased a new orbital sander, which was a life saver. Use a good painter’s tape like Frog brand to prevent it from bleeding. Ours took forever to dry, so plan for that too. Good luck :)
I absolutely love how the staircase update turned out! The transformation with the stripped and stained wood gives it such a warm and inviting feel. Can’t wait to see how you style the space around it! Great work, Satori Design!