It’s All in the Details: Basement Update
Sharing our basement renovation update, including snack bar cabinet details, hardware selection, marble backsplash options and more!
We’re rounding third base on our basement renovation, and I couldn’t be happier. To recap, we started with an unfinished basement and set out to create a family-friendly room for entertaining and relaxing, as well as additional space for when we have overnight guests. To date, with a lot of help, we’ve completed the framing, electrical, drywall, trim work, painting, and flooring.
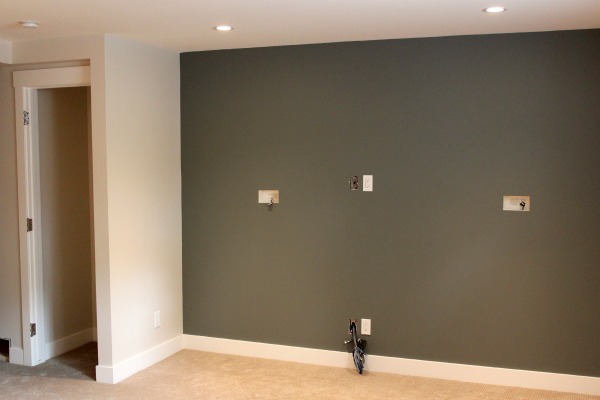
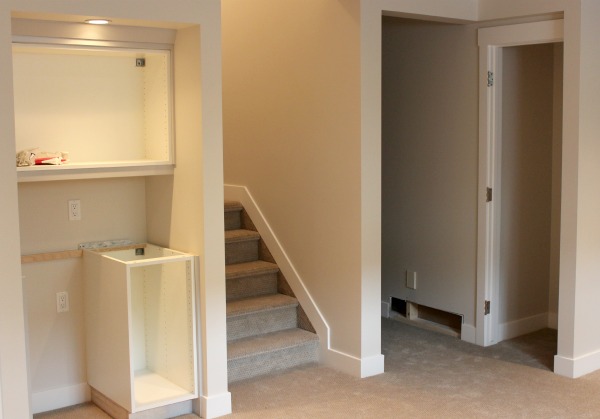
Here’s a sneak peek of our progress.

As with most renovations, we’ve had our share of bumps along the road, including doors that didn’t match, an obvious slope in one corner of the ceiling, and speaker wires installed backwards (to name a few). However, these have all been addressed and the room is shaping up to be just as we had envisioned.
The next step in our basement journey is re-hanging the shaker style doors, finishing off the snack bar area, and mounting the TV and speakers (in those little niches). I’m also waiting on two ceiling light fixtures to arrive so they can be installed in the stairwell and hallway. Then, it’s on to furnishing and decorating the space.
Basement Snack Bar Finishes
While I was planning the snack bar area, I had trouble deciding on a number of factors. Should the cabinets be painted white or grey? Upper cabinets with glass doors or open shelving? Subway tile backsplash or marble? Overhead lighting or under cabinet? The number of decisions to make for this small area really added up.

After careful deliberation, I decided to go with light grey painted cabinets. I purchased the cabinet boxes from IKEA and had custom maple doors constructed and spray lacquered in Para’s SR-43 Shoreline, part of the Sarah Richardson collection. I then took the upper frames to our local glass shop and had reeded glass installed.
Approaching it this way took a little more effort, but ended up costing about half the amount of fully custom.

For the countertop, I chose Caesarstone’s stone grey quartz. I think it will add depth to the area and tie in some of the other mid-toned grey elements in the room. It is being installed later this week.

For the backsplash, I’ve decided to go with marble, but I haven’t finalized anything. Here are some of the tile styles I’m considering, including hexagon, penny round, mosaic and more.

I really like the tumbled rectangular mosaic (shown in the middle right side) and will probably end up going with it. I think it’s classic in design and prefer that it isn’t shiny like the polished options.
For the hardware, I was inspired by one of Martha Stewart’s kitchens and found something similar at Restoration Hardware called Asbury. I opted for the brushed nickel finish to complement the stainless steel beverage fridge that will be in this area.

I’m excited to finally be past the messy part of the construction phase. As the room comes together and my vision grows stronger, I’ve been able to start collecting a few decor pieces in my travels and that’s the fun part for me.
Look for a basement update to come in the next couple of weeks! You can also see our whole basement renovation series if you’ve missed anything along the way.
Want more home improvement projects like these sent directly to your inbox? Be sure to SUBSCRIBE.
Enjoy your day!


Love the marble backsplash tile. It’s gorgeous! And the hardware is perfect. Who sprayed painted your Ikea cabinets?
They’re actually only ikea boxes and I had the cabinets doors and drawer front custom made. They were sprayed by my painter. Look custom, but for a lot less!
Wow, it’s really coming along, Shauna! I can’t wait for the full reveal – it looks like it’s going to be a beautiful space :-)
Thanks Shelia! We’re really looking forward to being able to finally use the space.
Love the paint colors! What color and material is the carpet?
Hi Erin, It’s Etchware 510 Oasis Tan by Mohawk. The material is 100% SmartStrand Silk BCF Triexta Fiber. I believe it’s been discontinued, but there are similar options.