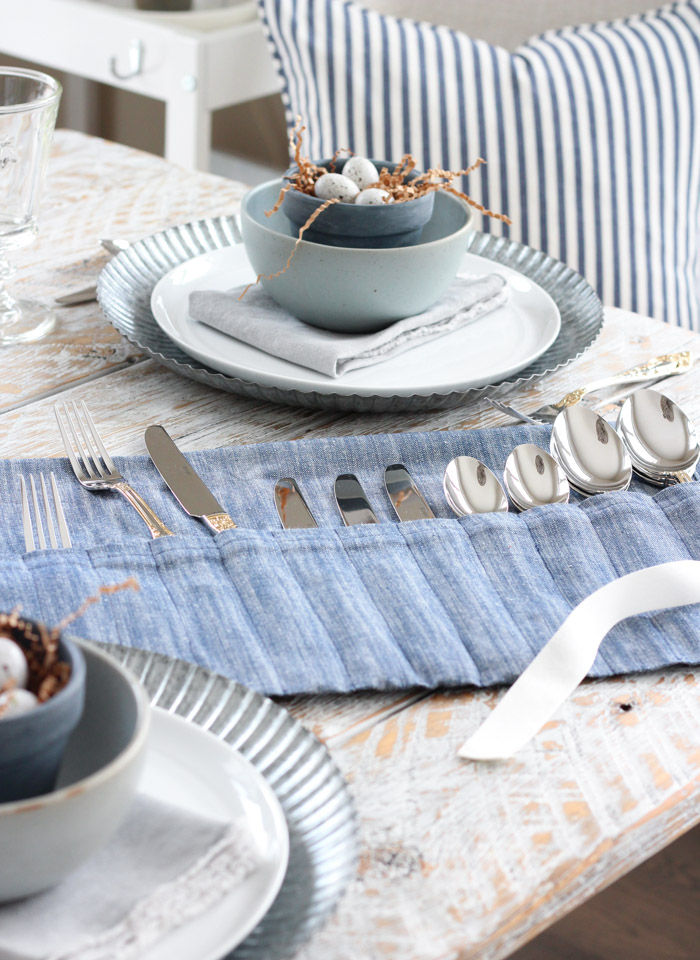
Tea Towel Flatware Holder – 5 Easy Steps
Make a flatware holder using a tea towel and ribbon. You’ll love this space-saving organizer that protects your utensils and tidies your cabinet. A quick and easy sewing project!

Hello friends. Now that spring is here, I’ve been cleaning and organizing the neglected areas of our home. After my coffee incident a few weeks ago that basically required an impromptu deep cleaning of our kitchen, I decided to carry on in our dining room.
We only have one small cabinet that stores dishes (we mostly use for special occasions and entertaining), plus cloth napkins and flatware sets. Until recently, it was a bit of a disorganized mess.

DIY Flatware Organizer
If you’re anything like me, having multiple flatware sets (or cutlery or silverware) shoved in a drawer or tucked away in the back of a cupboard, drives you nuts. I’m guessing you’d rather have it stored in a way that’s space-saving, easy to access and protective? If you’re nodding your head YES!, then you’re going to want to make a tea towel flatware holder too.

This post is part of a seasonal blog hop hosted by Happy Happy Nester, Modern Glam and My 100 Year Old Home. Be sure to check out the other fantastic ideas from my blogging friends linked at the bottom!
Ever since my mom sewed cutlery storage rolls for us when we were married, I’ve wanted to make more. It’ll be 25 years this summer, so I guess you could say I’m a bit of a procrastinator. Oops!
However, a positive side of the pandemic (at least for me) has been finishing these types of projects I never seemed to get around to before. Has it been a similar case for you?

And, because I like to simplify projects whenever possible, I figured out an easier way to construct them. My mom’s version involved layering fabrics and finishing the edges with bias trim. They’re lovely, but time consuming.
Instead, I used a sturdy tea towel, which eliminated a couple steps. From beginning to end, this utensil organizer took under 30 minutes to make using basic sewing skills.

Once you have your flatware organized, setting the table is a breeze, whether it’s Easter or any other occasion. I love that it stays dust-free, is easy to transport, as well as convenient to put away once it’s washed. Organized spaces feel so much better, don’t they?!
Some links used in this post are affiliates. Please refer to my disclosure policy for more information.
How to Make a Flatware Holder
Supplies and Tools
- Tea towel (I used 22 x 31″. Make sure it’s sturdy.)
- Ribbon (I used 1″ cotton, 40″ length)
- Thread (to match tea towel)
- Sewing machine
- Measuring tape
- Straight pins
- Scissors
- Iron
- Painter’s tape or chalk pen
Sewing Instructions
Step 1: Start by pressing your tea towel to remove creases. Lay flat with right side facing down and shorter sides at top and bottom. Fold up bottom edge 1″, pin in place and sew using a 5/8″ top stitch from edge.
Step 2: Fold up from bottom again 7″ (see note below), pin at sides and top, then press in place. Stitch sides together using your foot as a guide along each edge.
Note: Adjust fold height according to your flatware. I recommend having the tips of the shortest pieces sticking out the top for easy access.
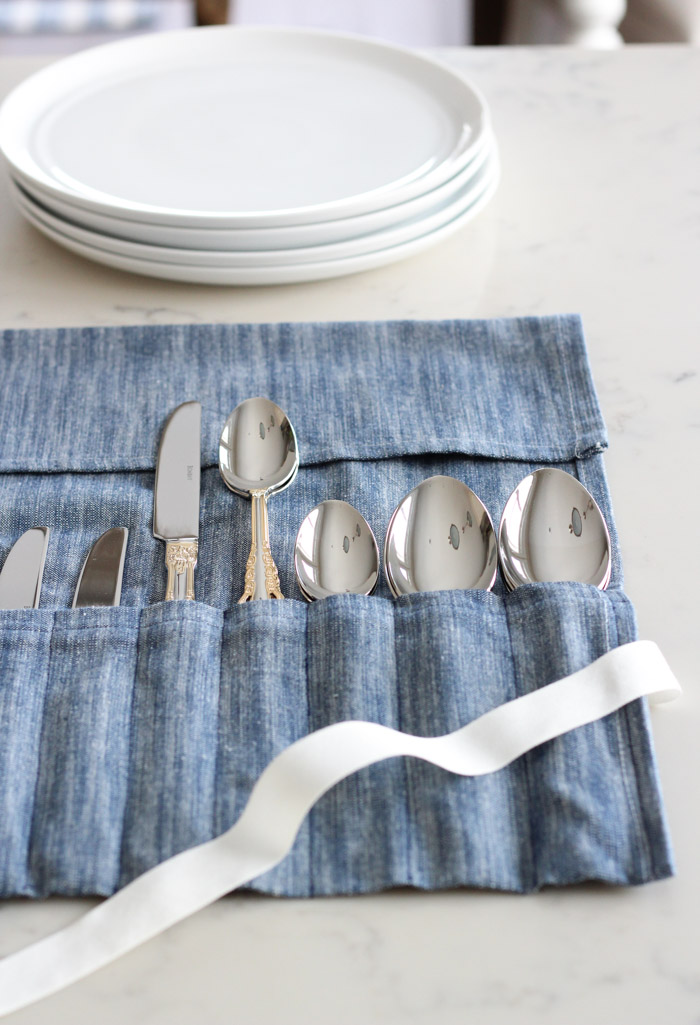
Step 3: Place widest piece of flatware along seam edge and bottom of fold (see note below). Allow for a bit of extra room, then stitch a straight line from top of fold to bottom to create pocket. I used painter’s tape as a guide, moving it as I went along. Chalk works too. Continue stitching lines until all pockets are formed.
Note: I created slightly different pocket openings for various utensil widths (plus stacking spoons and forks). I suggest placing all flatware pieces along bottom first to come up with your layout.
Step 4: Cut a length of ribbon (about 40″). Finish ends by pressing under twice, then stitching in place.
Note: Adjust ribbon length if using a smaller tea towel.
Step 5: Flip flatware holder over with pockets facing down. Measure 8-9″ from left edge to find closest existing pocket stitch line. Measure 4-5″ up from bottom. Place ribbon right side up with bottom matching this point. Stitch in place over existing stitch line.

How to Use Your Roll Up Cutlery Holder
Place flatware pieces in each pocket as you planned out. Fold down top of tea towel so it’s about 1″ above the top of your tallest flatware piece. Fold down again forming a straight line at the top.
Begin rolling your silverware holder from left to right, keeping top and bottom edges lined up. Tie ribbon in a bow to secure. (See my IG story highlights for video.)
Store in drawer or cabinet until needed.
Tip: If you have several flatware sets, attach tags to the ribbon.
More Spring Fabric Projects

My 100 Year Old Home | DIY Craft Easy Vegetable Printing
Twelve on Main | Easy DIY Embroidered Tea Towels
Happy Happy Nester | How to Make Felt Flowers
Tatertots and Jello | Pillow Cover with DIY Macrame Fringe Trim

Most Lovely Things | DIY Canvas Wrap Vase
The DIY Mommy | No Sew Ruffled Tea Towel from Scrap Fabric
Zevy Joy | How To Sew An Apron From A Kitchen Towel
My Sweet Savannah | DIY Shibori Flag
Satori Design for Living | DIY Tea Towel Flatware Holder
For more sewing ideas, check out my gardening apron and roman shade.
Want more home organizing ideas like these sent directly to your inbox? Be sure to SUBSCRIBE.
Enjoy your day!


I love the flatware holder you’ve showcased here. It’s amazing how such a small accessory can make a big difference in the overall dining experience!