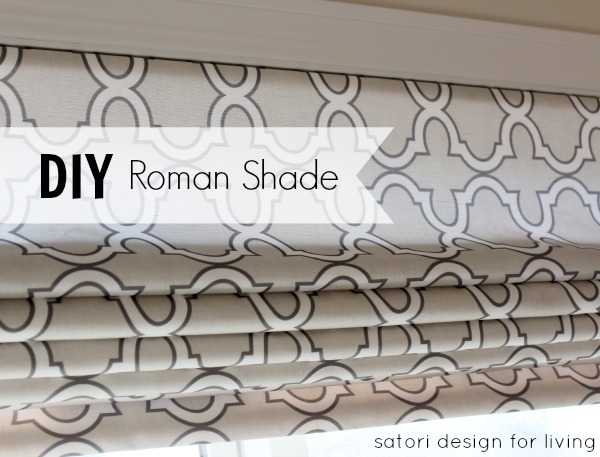
DIY Roman Shade Using Spoonflower Fabric
This DIY roman shade was totally doable using a sew plus no-sew technique. Follow these step-by-step detailed instructions for budget-wise and professional looking results!
When we first moved into our current house more than 10 years ago, I had lofty ambitions to create custom window treatments for every room. I managed to sew drapery for our living room, kitchen, and dining room, and even sewed a roman shade for our bathroom. Then, the busyness of life got in the way and those plans came to a halt.
For years, I’ve wanted a patterned roman shade in my office, but paying the hefty price for a custom one was something I wasn’t willing to do. They tend to cost a small fortune.
Last week, I finally tackled this long-awaited DIY Roman Shade project, and I’m thrilled with the results!
To backtrack a bit, I came up with the idea a while ago to start a new series where a small group of bloggers would be given the same medium to work with. It would then be up to each of them to decide what they wanted to create or decorate using it. The premise was:
“What can you do with…?”
To kick this series off, I asked Jamie, Jennifer, and Beckie to show what they could do with 2 YARDS OF FABRIC. (You’ll get a sneak peek of their beautiful projects in a bit.)
Some links used in this post are affiliates. Please refer to my disclosure policy for more information.
I was thrilled when Spoonflower agreed to jump on board for the first round of this series. Each of us were able to select 2 yards of linen-cotton canvas from their amazing selection of prints. After spending way too much time on Spoonflower’s site (it’s so easy to get lost in all the goodness!), I settled on a modern trellis fabric called Claudette. When it arrived, I was very impressed with the quality.

DIY Roman Shade
Creating your own custom roman shade isn’t difficult, just time consuming. If you’re going to attempt it for the first time, I suggest starting with a solid color or small pattern for your fabric. Using a large-scale print like I did requires very precise measuring to get everything lined up just right. Also, if your window isn’t completely square, it’s better to forgo a large print.
The technique I use is a combination of “sew and no-sew” to give you professional results without all of the hassle. The deconstructed mini blind technique I’ve seen is great for blackout fabrics, but I’m not a fan of seeing the horizontal slats when the blind is down. The method I’m sharing today is perfect for semi-transparent fabrics when you want a bit of the light to shine through. You will only be able to see the tape slightly where the string runs through. So much better!
Supplies
Note- these will make sense as you read through the instructions, so I suggest reading through to the end.
- Fabric (width of your window plus 5/8″ seam allowance on either side) x (length of your window plus extra 5″ for hem, seam allowance and top)
- Lining (same measurements as above- type will depend on transparency you want)
- Thread (to match your main fabric)
- Roman blind loop tape (sheer with nylon or plastic loops) (approximately length of window x width for every 15″ interval or so)
- Nylon string/cord (same as roman tape yardage x 2.5)
- 1″ Eye Hooks (screw in metal type)
- Board (I used primed pine- about 2 ½” deep x ¾” high x width of window)
- Corner Braces- 2 (around 2 ½”)
- Iron-on hem tape (width of window)
- Dowel (just under width of window)
- Cord/String cleat (around 3″)
- Screws to attach the board, corner braces and cleat
Tools
- Scissors
- Straight pins
- Iron and ironing board
- Sewing machine
- Chalk or fabric pen
- Measuring tape
- Ruler
- Large square
- Hand-sewing needle
- Tacks
- Staple gun
- Lighter
- Screw driver
- Drill (optional)
How to Make a Roman Shade
- Carefully measure your window and mark the cutting lines on your fabric (adding the allowances shown in the supplies list) using a square and chalk pen.

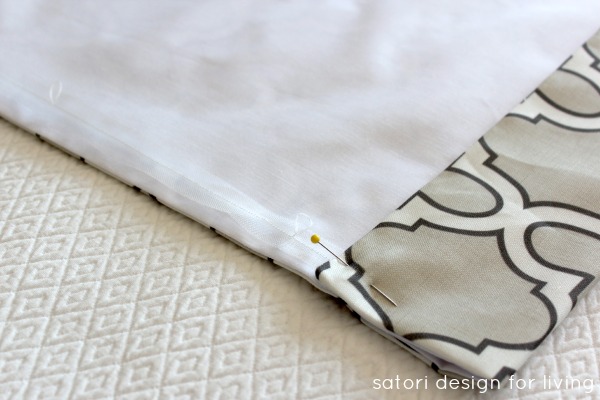
- Pin right sides together (leaving an opening where the top of the blind will be to turn right sides out after stitching) and stitch all around using a 5/8″ seam allowance.

- Trim the lining portion of the seam allowance down a bit all around the perimeter, as well as both fabrics at the corner.

- Turn right sides out and press all edges, turning the top edges (where you haven’t sewn yet) under. Pin in place.
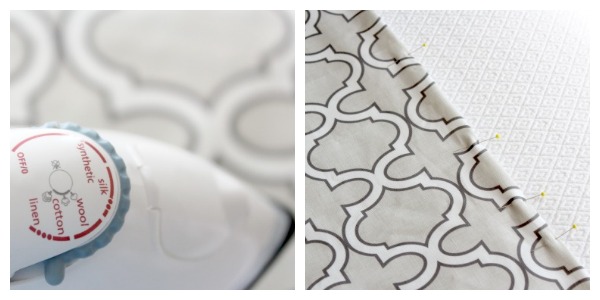
- Stitch along the top edge of the fabric near the edge to close up the hole. Give it all a good pressing once again.

- Turn the bottom edge up 3″ to create the hem. Press in place and pin.

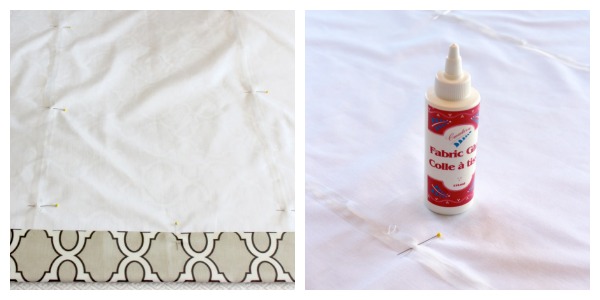
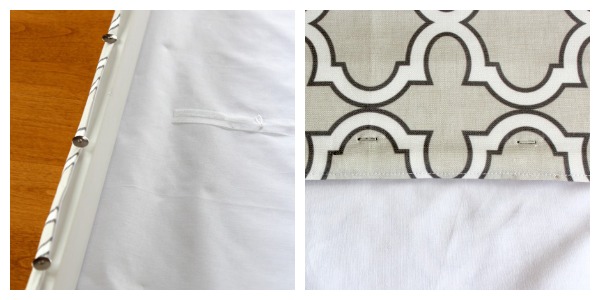
- Lay the entire piece on a flat surface with the lining side facing up. Measure 4″ up from the bottom and that’s where the bottom loop of your roman tape should start. Pin just in from the outside edge and work your way up until the top loop ends about 7″ from the top of the fabric.
- Repeat on the other edge, using a square to make sure everything is even. Pin tape to the middle portion of the fabric at even intervals (no more than 15″ apart) using the same method. After it’s all pinned on, double check measurements to ensure it’s as accurate as possible (this will determine how straight your roman shade will be when you raise and lower it).
Use fabric glue to secure the roman tape to the lining. Leave the pins in place to make sure the tape doesn’t shift. Let dry overnight.
- To keep everything secure, hand stitch at each loop (catching the liner and outside fabric) only going around a couple of times and knotting on the lining side.

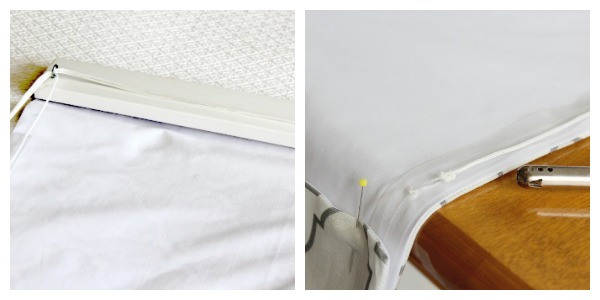
- Lay the board on its side all along the top of the fabric (lining side). Measure from the top of the board (where it touches the fabric) down to the bottom of the hem. This should equal the height of your window. Wrap the top of the fabric up and tack in place (this is a dry fitting to make sure the whole thing is square and the proper size before permanently stapling in place).
Now, have someone hold the blind up in the window (board at the top) and check for approximate fit. If everything looks good (square and even), staple the fabric in place at the top and remove the tacks.
- Lay face down and line a ruler up with the roman tape and measure ¾” up onto the board and mark. Screw a metal hook into the wood and repeat for every line of roman loop tape.

- Feed the string (cord) through, starting with the metal hook on the left side, working your way through the rest of the board hooks and then down through the roman tape loops until you reach the final loop on the bottom right hand side. Knot in place and melt the end with a lighter. Cut the long end of the string at the point where the string meets the bottom hem on the left side. Repeat until you’ve gone through each row of roman tape.
Roman Shade Installation Instructions
- Mount the board to your window frame (lining it up with the outside edge) using the corner braces and screws. You may want to mark and pre-drill your holes to prevent cracking. (Note: Your top screws only need to go into the board and your side screws will go into the window casing to hold in place.

- Check to see if the bottom hem edge is lined up square to the bottom of the window. Adjust as necessary. (Note: I allow mine to hang overnight before I do the final hem to allow it to settle in properly). Use the iron-on hem tape to secure the hem in place leaving room for the dowel to slip through. (Note: I do this by having someone hold the ironing board under the hem while I press it in place for higher windows). Let cool and feed dowel through.

- Mount cord cleat inside the window casing on the same side where the string hangs down (usually right hand side). (I usually mount mine near the center of the casing about ¾ of the way down from the top of the window.)

- With slack taken out of each string, grab the lengths in a bunch and begin to pull down. Folds will begin to appear (you may need to train them to start with). Wrap the cord around the cleat to hold in place.
**Note: A word of caution when it comes to small children and pets: The cords used to lift and lower this DIY roman shade can be a safety hazard. Only install in rooms where this isn’t a concern. Be sure to check your local safety standards first.
Finally, you’re done your fabric roman shade. Phew!
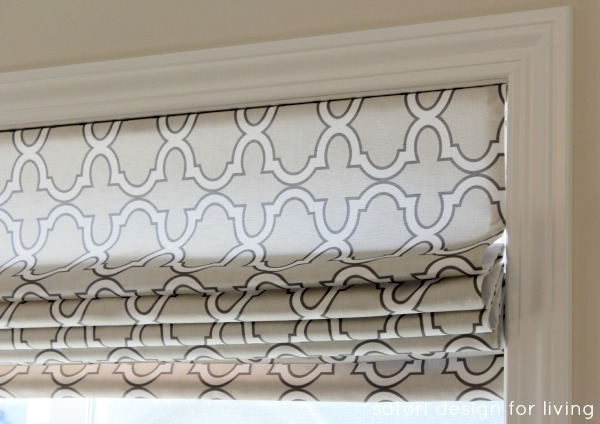
I love the bit of texture the linen fabric has along with the pattern. It’s the window treatment I’ve always wanted for my office window for much less than a custom roman blind!
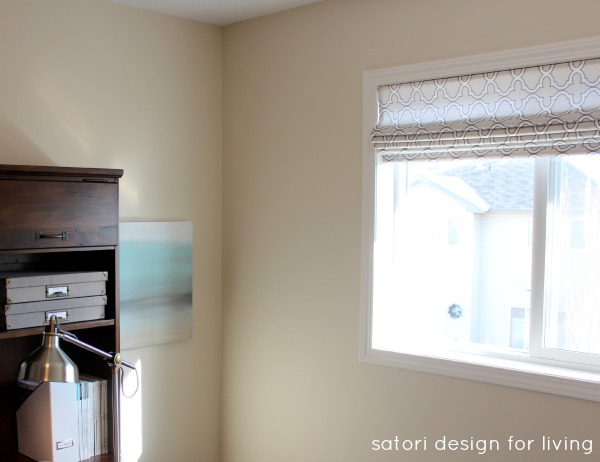
Although the fabric roman shade is totally operable, I also installed a roller blind behind. It’s a quick and easy way to block out the heat in the summer and provide total blackout when my office is used as a guest room. The best part is, you can’t even tell it’s there.

Do you like patterned roman shades too?

More Ideas Using 2 Yards of Fabric or Less
Ready to check out all of the other gorgeous projects using Spoonflower fabric?
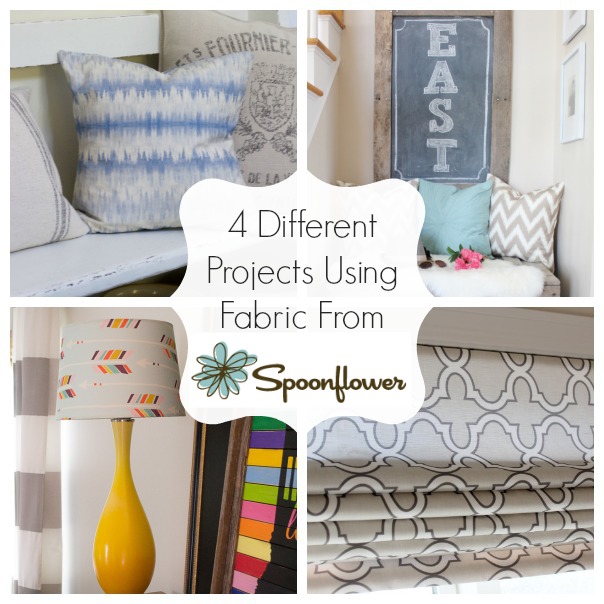
Envelope Pillow Cover by Jamie at So Much Better With Age
Nook Makeover with DIY Pillows by Jennifer of City Farmhouse
Fabric Covered Lampshade by Beckie of Infarrantly Creative
DIY Roman Shade by Shauna of Satori Design for Living
*A big thank you to Spoonflower for supplying the fabric for all of our projects! Luckily, I still have enough fabric left over to make a pillow- yay!
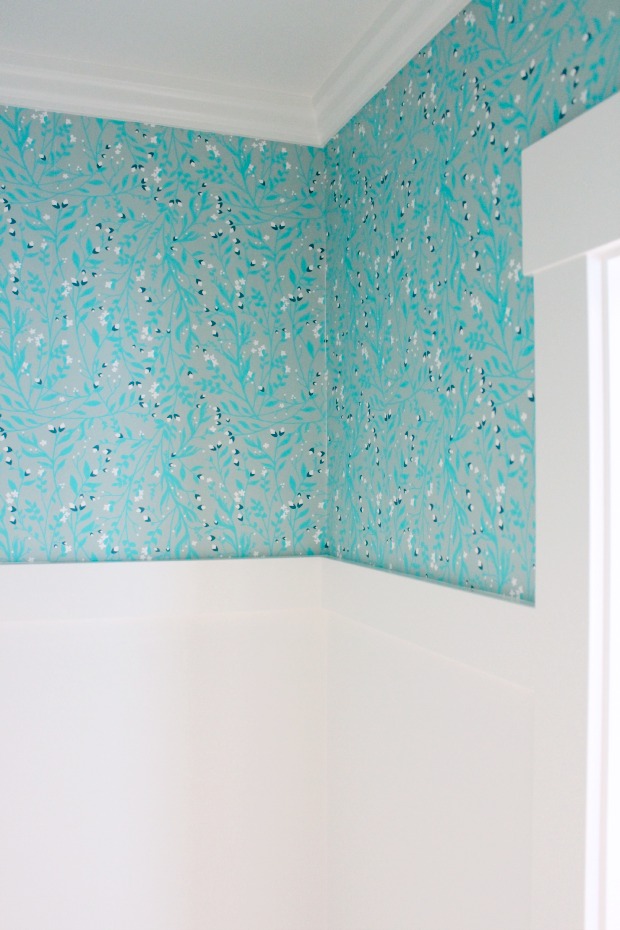
Did you know Spoonflower also makes wallpaper? Check out my powder room wallpaper project!
More Sewing Projects
Want more home decorating ideas like these sent directly to your inbox? Be sure to SUBSCRIBE.
Enjoy your day!

Turned out so well! I love the fabric you picked. Thanks for the step-by-step, I’d love to give this a try
Thanks Tia! I’ve seen some of your projects and I’m sure you’d handle this one no problem!
Hmmm…I wonder how difficult this would be?! I would love to try!
Start with a solid or smaller patterned fabric first. Perhaps do a laundry room window or somewhere that won’t be seen all of the time until you know how it’s going to turn out. I find that if you take your time and measure, measure, measure, it works out. Let me know how it goes!
Wow, Shauna! What an amazing project! I’m not sure I could attempt this but you made it look so easy. Love your Spoonflower fabric!! So fun being in the tour with you today ;)
Hugs,
Jamie
This project is time consuming, but you could totally do it. Save yourself a few hundred dollars (worth it to me)!
Wow! Incredible project Shauna! I love the fabric choice too! Thanks for including me! Jen
You did a fantastic job Shauna! So impressed! I love the choice in fabric. . .a timeless look for years to come!
Love the fabric. Beauty! Great job Shauna. I love that the blind still goes up and down for privacy and looks gorg. Alicia
Wow, Shauna! You are ambitious! They look lovely! I’m going to keep your tutorial in mind for window coverings I’d like to do in my house. Thanks so much!
I can’t believe you made this – it looks so great!! And I really love that fabric.
Wow Shauna, is there anything you can’t do!? Amazing! I love it so much, I just may attempt it! ;)
Great tutorial Shauna! Your fabric choice was beautiful! I had a blast designing a fabric line for Thistlewood Farms gatehouse… it is also available at Spoonflower and like you I was impressed by the quality of the fabric.
Yes, I’ve seen your gorgeous collection. I’m thinking about designing a few fabrics too now that I know what the quality is like!
Shauna this shade is beautiful – I absolutely love the fabric you chose for it! I really need to learn how to sew better!
Oh my gosh Shauna! Your fabric is stunning and your shade looks incredible! Speaking of incredible, what a fantastic tutorial – off to pin! Thanks for this!!!
Great pattern! I really need to try this!
Wow, your Roman shade looks great Shauna and I love your fabric choice – that’s beautiful! All of your projects look great too, how fun!!
Such a professional job! I would have given up after step 2!!! ;)
Love how it looks, and that fabric is beautiful!
I’ve seen your projects and know you wouldn’t give up. Really, it’s not that hard!
Beautiful fabric choice! I would love for you to link this up to the Be. You. Tiful Link party that goes live at 6pm PST on Thursday night. Pinning this :)
I absolutely ADORE the roman shade you made! The pattern of the fabric is AMAZING!!
Featured you this evening! :)
AWESOME Shauna!! It has been many years since I made roman shades and I am thrilled to have this tutorial. Pinning and sharing on my FB page!! Thanks for it – PS I love love love your stunning fabric choice!!
So pretty! I need to make a few for the little basement windows.
That turned out great, Shauna! I love the pattern, too. So pretty!
I made a roman shade once ….it was a disaster! Love your version – and that fabric is gorgeous! Great series Shauna!
Was it one you had to sew or the 100 % glue method? Oh, that drives me nuts when I buy the supplies for something, put in the time and it’s a total fail!
Beautiful and it looks and sounds so simple, they would also look great in my living room!
I love the fabric you chose! It looks great as a roman shade!
I’m very happy with it. Spoonflower has great quality.
Super gorgeous! The fabric and the quality… wow!
Thanks Donna!
I want to make some of these so badly and seeing how beautiful yours are really makes me want to run to the fabric store now! Thanks for the great tute!!
It takes a little time and patience, but it’s so worth it in the end!
WOW. I’m speechless. These Roman shades came out so beautifully. I’ve been thinking of making some for our living room because the sun hits my desk harshly mid-morning when I’m trying to work in there. I’m definitely bookmarking this tutorial for when I finally tackle that project!
Thanks for sharing!
Thanks, Megan. So sweet of you to say! If you follow step-by-step, yours should turn out beautifully too. Let me know if you have any questions. Good luck!
How do you get the shades to fold evenly and lay flat without gathering like a ruffle? Any tips on gluing the tape without sealing the whole thing down? Novice but brave! I love these! I’ve read a dozen tutorials and feel like yours is the best looking! Thanks in advance!
Hi Tammy, As you pull the strings down to lift the blind, you can train the folds. Then, they will stay that way naturally over time because of the weight of the rod at the bottom. For the glue, apply it evenly down the center of the tape making sure you don’t miss a spot (Don’t use too much or press down too firmly. That way it won’t bleed through to the main fabric.) Let me know if you have any other questions. Good luck!